Ellen and I both always
had other interests than our work and
soon after we got married we decided to find new interests that we could do
together or at least in proximity. Like "parallel play". Ellen had been a
serious musician, playing the harp, and had done some sewing. I had always
built models, mostly stick and paper airplanes, but had gotten interested
in ship models while in Philadelphia.
After some discussion and reflection, we decided that I would get more into
wood working and she would pursue
weaving. We both were interested in antiques
and had purchased some in Pennsylvania. Our purchases were simple country
furniture, carpenter made, rather than elegant city furnishings and I wanted
to learn more about building fine furniture. We had also gotten interested
in antique weaving and fabrics and Ellen wanted to explore that.
Not long after, Ellen and I moved to New Orleans and there,
we settled into new lives as gainfully employed people. And began
to implement our plans to explore hobbies. As well as exploring a
new city.
The story of our first time in
New Orleans tells of the small shotgun
house, a former neighborhood store, we rented and used as a studio and
workshop and some of the adventures and friends from that time. This page
will focus on the wood working and furniture building I started there and continued
until the stash of hardwood was gone and the machines had downsized out the door.
New Orleans Projects
I had a 10 inch table saw and a few hand tools to start and started by
building a couple of projects from a book by R. J. Decristoforo on
reproduction antique furniture. That author wrote many books on woodworking
and power tool techniques for Popular Science that were useful. Also a book
on the construction of antique furniture by Gottschalk that had plenty of
drawings to show the joinery and other details.
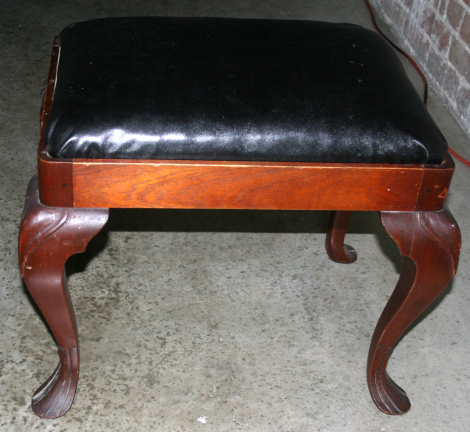
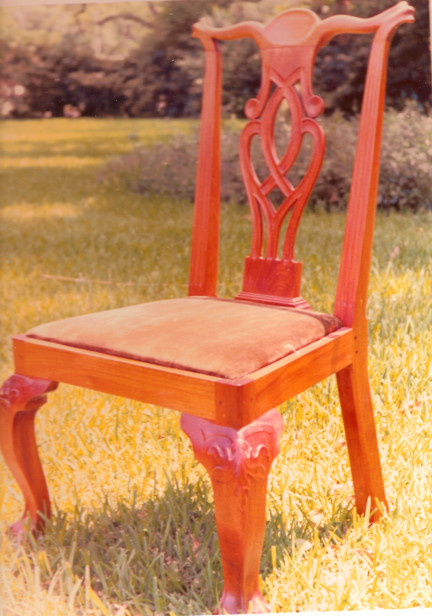
For a first project, I built a Queen Ann style foot stool and
followed that with a Chippendale style side chair both made from
Honduras Mahogany purchased locally at a lumber company, Dixie Lumber.
Dixie Lumber had a wide range of hardwoods and had fine mahogany
from its own plantations in Honduras. I bought lots of wood there and
had to build lumber storage racks in my wood shop. By the time we were
ready to move from New Orleans, I had several hundred board feet of
mahogany, African Mahogany, Rhodesian Teak, Santa Maria, Walnut,
and other woods. Some of it traveled with us for the next 45 years
through many moves and made plenty of furniture and other projects.
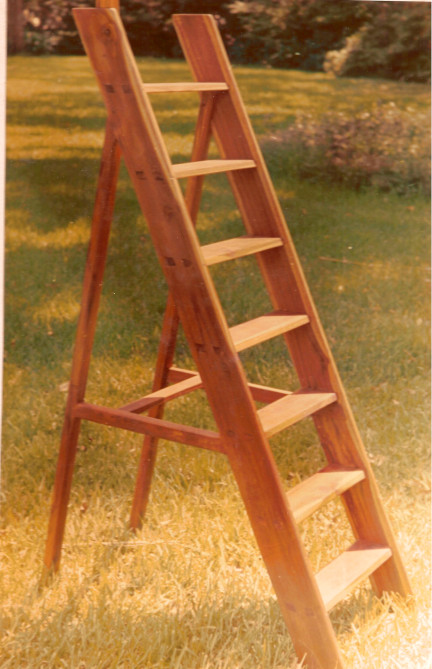
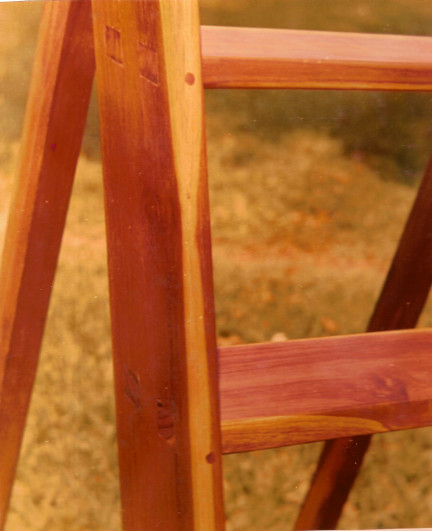
Here's a picture of a library ladder build for a friend from
Rhodesian Teak. I also built them a table for their new sailboat
out of the same wood.
During the first year in New Orleans we bought a sailboat,
an Ensign 22 foot boat. It had beautiful African Mahogany
benches in the cockpit, rift-sawed with a prominent ribbon
pattern, and I fell in love with that wood species. And stocked
up from Dixie Lumber.
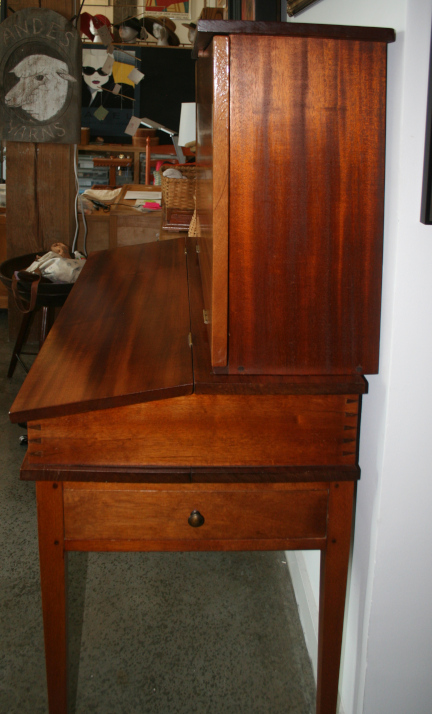
One of the first things I made from the African Mahogany was
a Shaker-style desk, with a drop down front. The plan was from a
magazine long ago forgotten. The desk has traveled everywhere
with us, and the only problem with it was that when we moved to
lower humidity locations, the wide wood in the drop down and in
the base of the desk split, because I had cleated them incorrectly.
I re-did the drop down and patched the splits in the bottom of the
desk in Santa Fe and the desk is still with us and used daily.

After we moved from New Orleans to New Hampshire, most of my wood working
was basic carpentry, maintaining the old house, barn, and outbuildings. I
did do some furniture building there, but it was later, once most of the
construction and reconstruction was nearly complete. My stock of hardwood
lumber spent some 20 years there, safe in the barn, stickered and drying.
I built a Shaker style wardrobe with drawers from local New Hampshire
white pine for one son. There was a large lumber company nearby with several saw mills
and I would check frequently there for newly milled pine. They let me pick
through the boards, and I would find clear white pine in 12 inch widths in
the bins there and take it home to dry in my wood shop for a year before
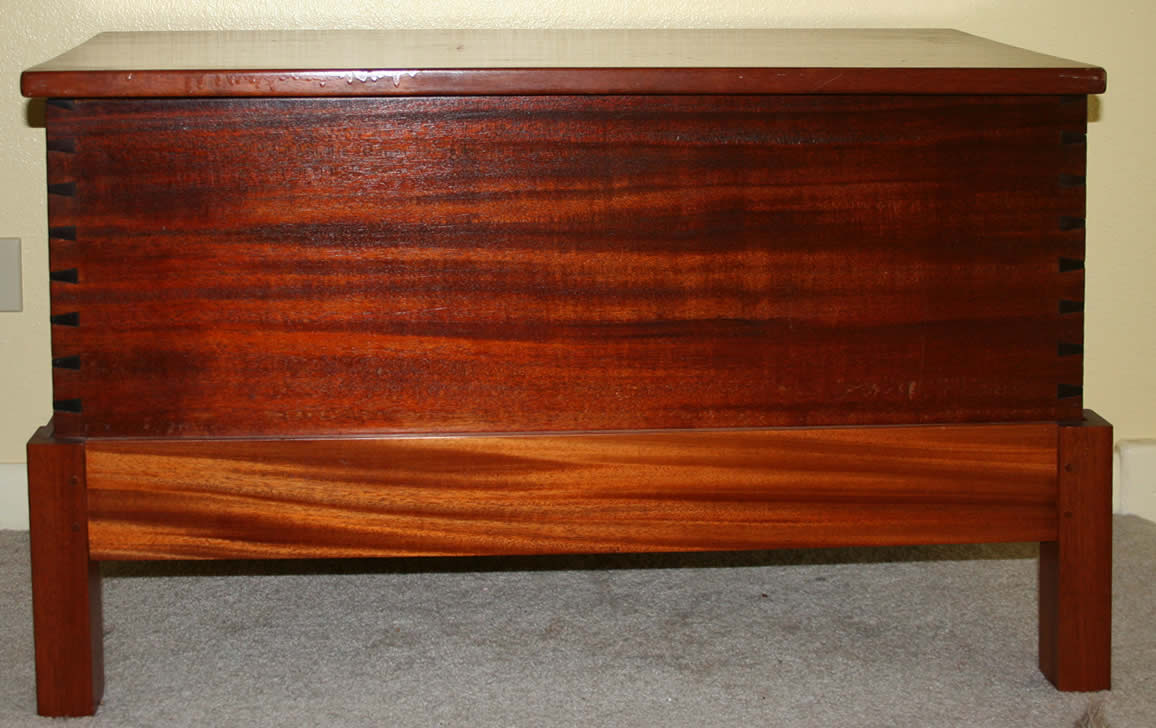
using it. I also made a toy chest of African Mahogany for another son.
Here's the toy chest.
Interlude
I didn't do much furniture making when we lived in Oklahoma, Virginia, or California.
Most of the wood working was shelf-making or milling lumber to use in my ship
model building. The ship modeling was taking most of my spare time by then, as I
had begun scratch-building models and made up most of the "lumber" for the models
myself, using mostly hard Maple and Red Oak that had been harvested at the farm
and added to my stash of hardwood.
Woodworking in Arkansas
When we moved to Arkansas, I set up an excellent wood shop in one side of the two
car garage in the house there. The other side was converted to a ship model shop.
The wood shop was used a lot as I remodeled the house. We converted one bedroom
to a library and I build floor to ceiling bookshelves. I set the wood shop up so
I could bring in four by eight sheets of oak or maple plywood and quickly cut them
down without assistance into shelf stock. All the workbenches and machines were set
to the same height, 36 inches, so it was simple to move large material around. Two
of the workbenches were also movable, so I could use them for additional support when
cutting plywood with the table saws. It also had a large dust collecting system.
Here's a photo of the wood shop in Arkansas.
There is a large lumber storage rack on the left for my stash of hardwood. I worked
over the several years there on multiple projects to get the stash down to reasonable
size.

Following are a few of the projects I made there.
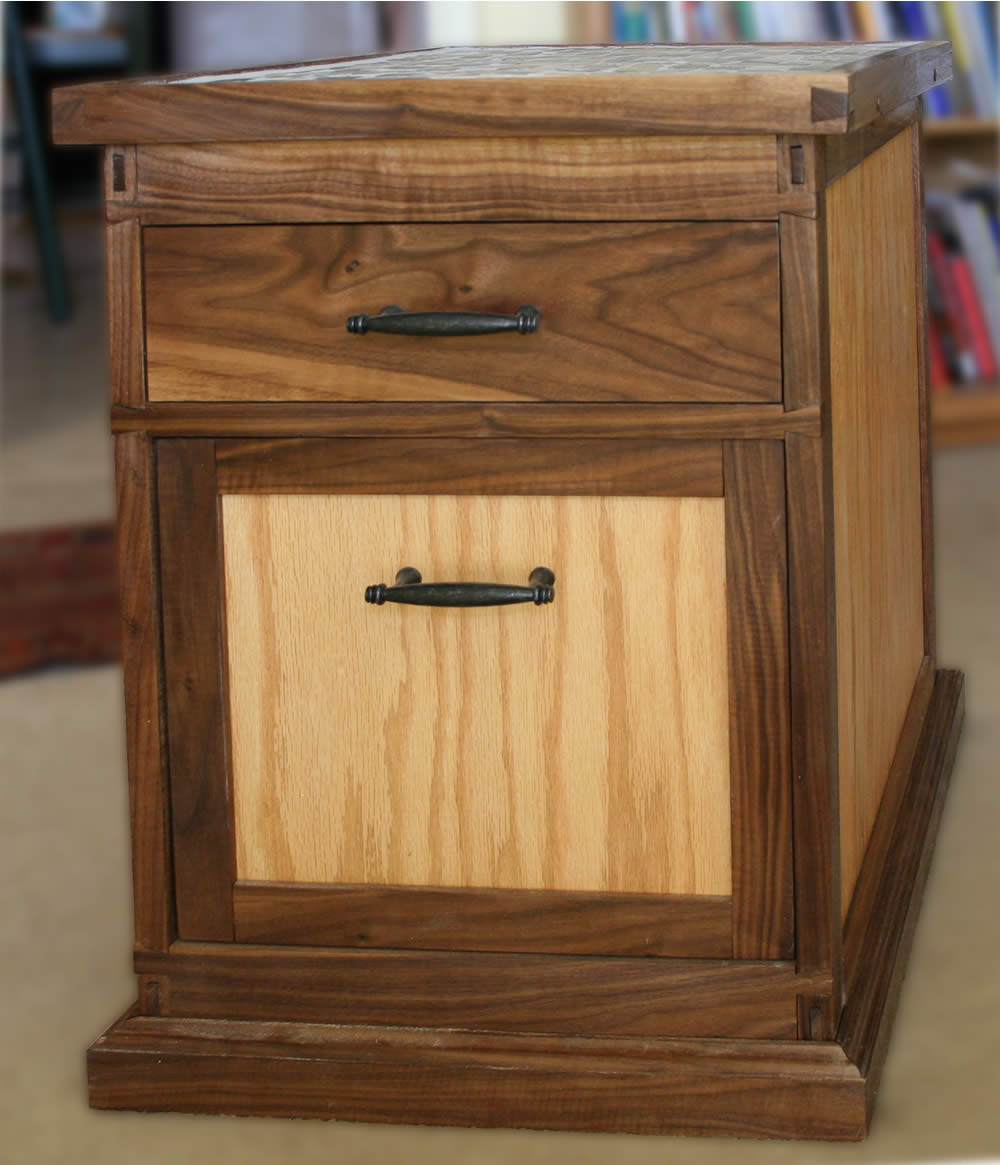
One Christmas I made some combination end table-file cabinets for the
sons. They were living in small apartments and this seemed a useful
thing to have and combined the two functions nicely. I covered the top
with tile and grouted it so it was waterproof, as a fine wooden surface
is really impractical for most people.
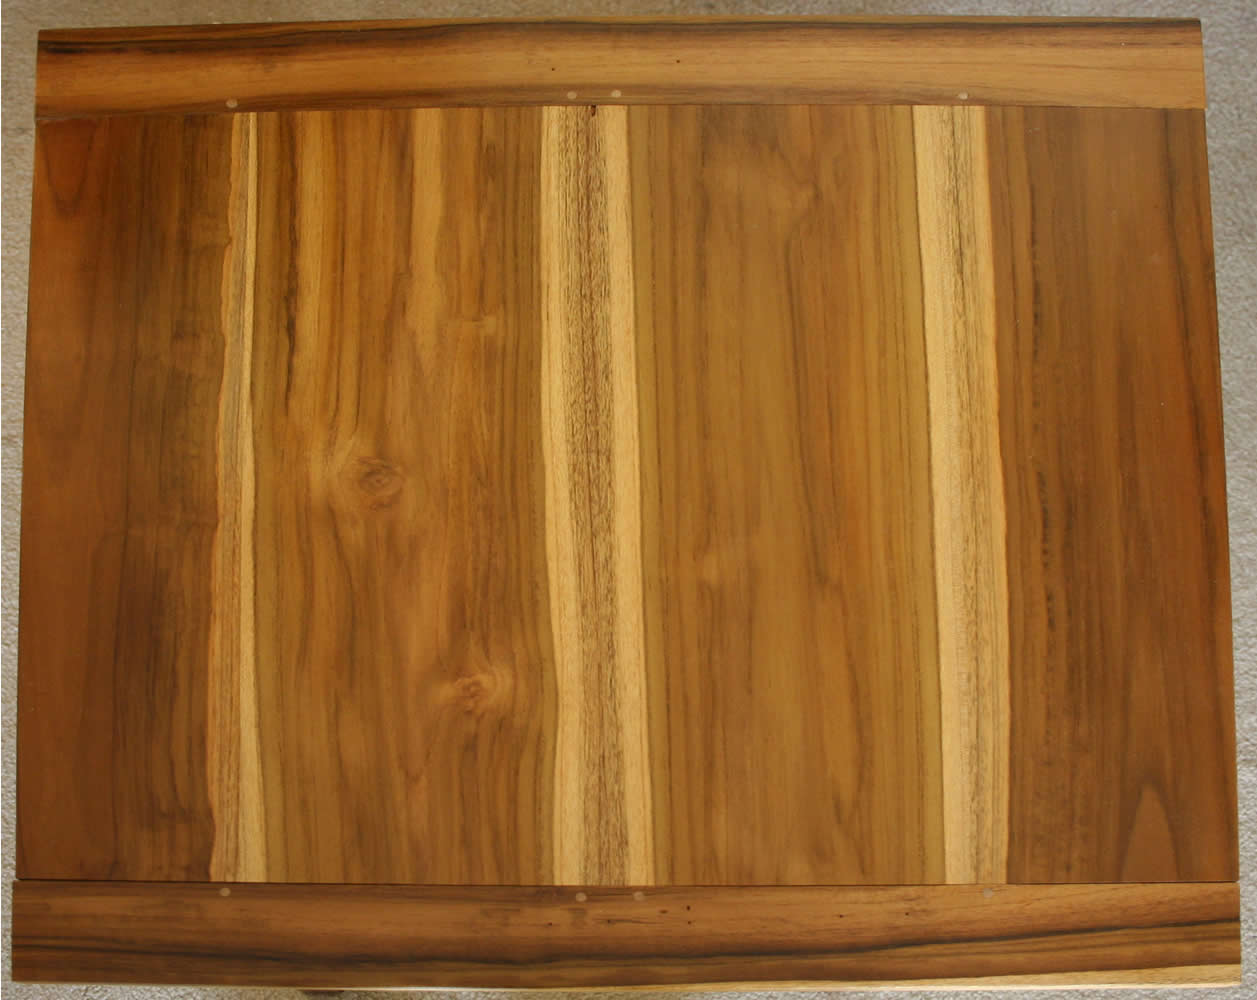
I also made a series of end tables using up some nice veneer I had
been carrying around for decades. I also experimented with different
joinery in these. A couple of these were for the library and functioned
as step-stools and seating. They were simple things of oak with
a thoya burl veneer top.
Here's a shot of the top of one of the library stools and of the side.
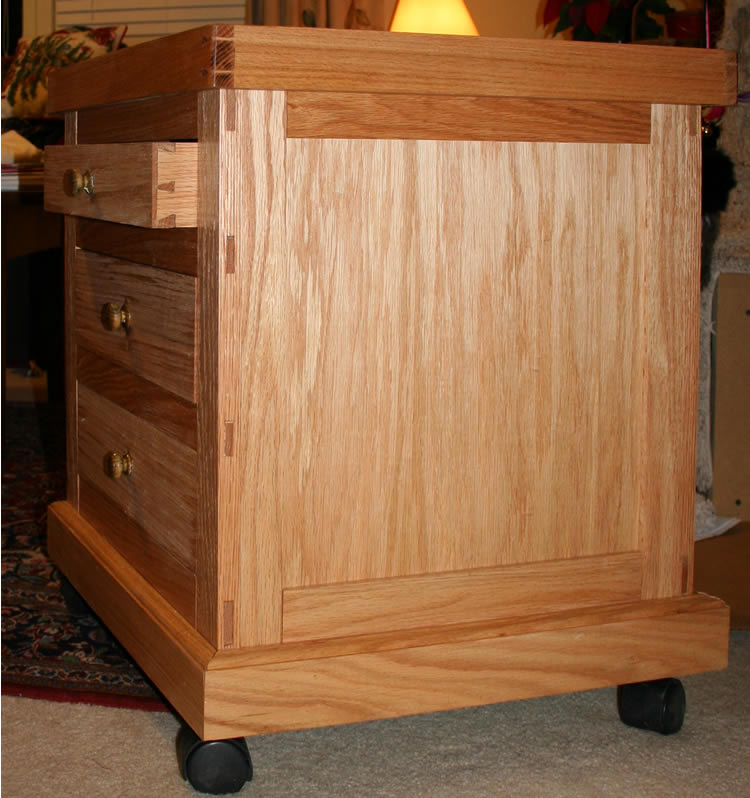
I also built a roll-about storage end table for Ellen's knitting
supplies. It is of red oak with dovetailed oak edging for a slate
top, so she can put a plant on it, or have her tea while
knitting. It has dovetailed drawers and turned walnut drawer pulls. I was
doing a lot combining different woods with and
without veneers at the time as you will see below.
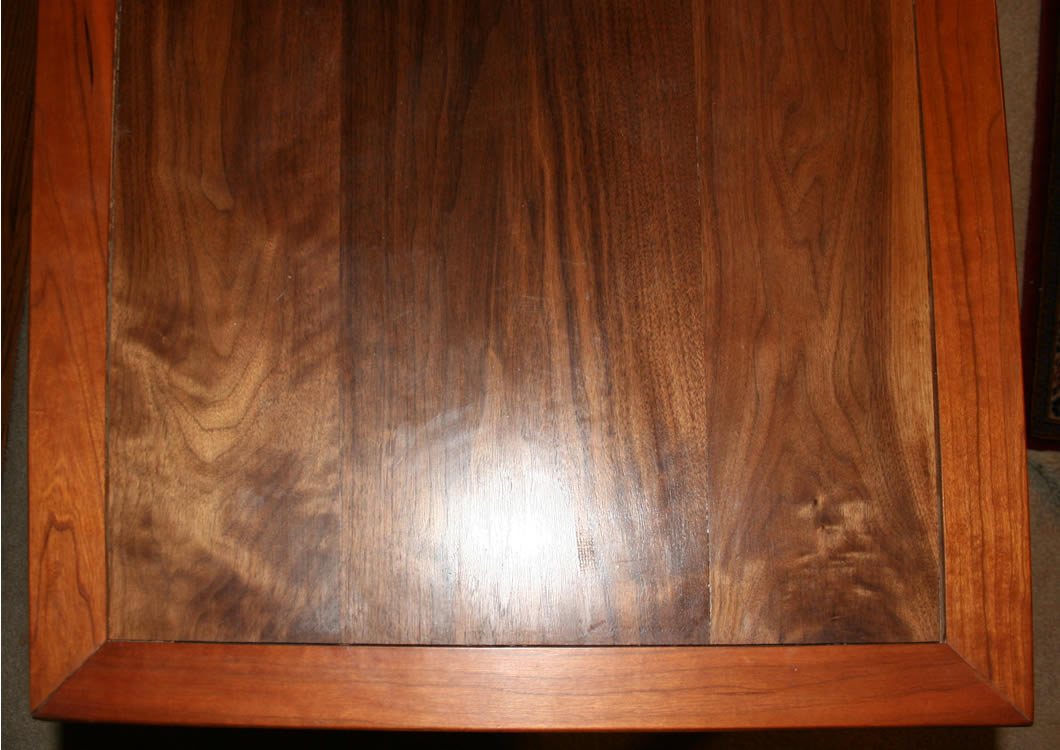
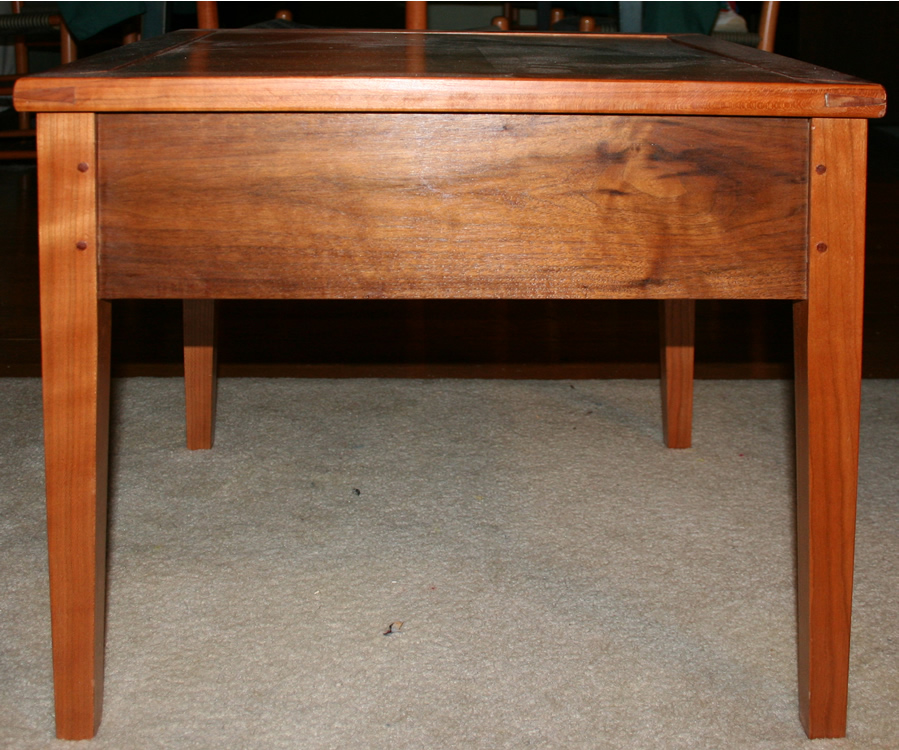
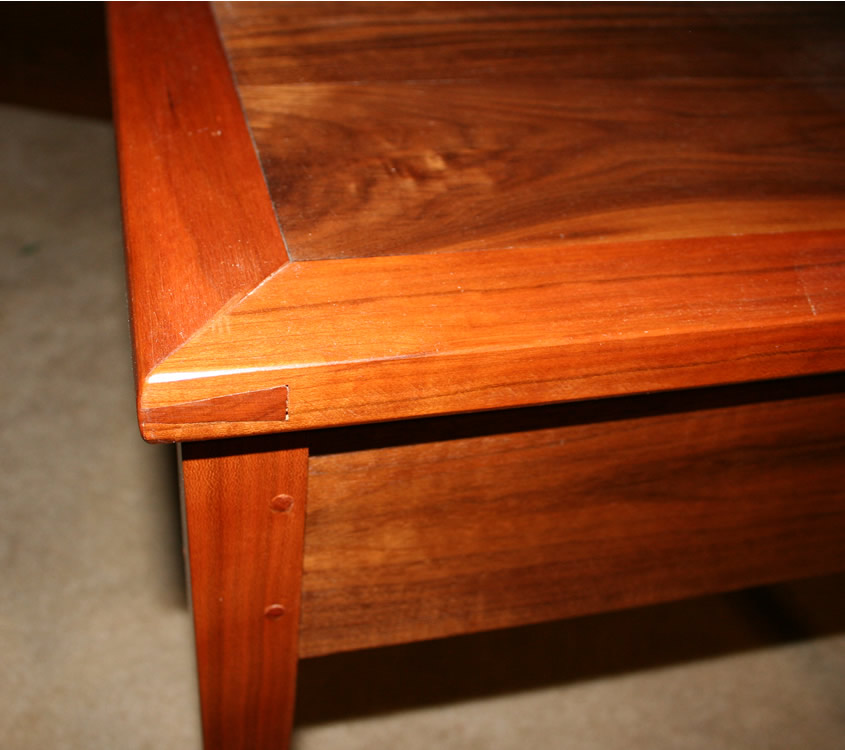
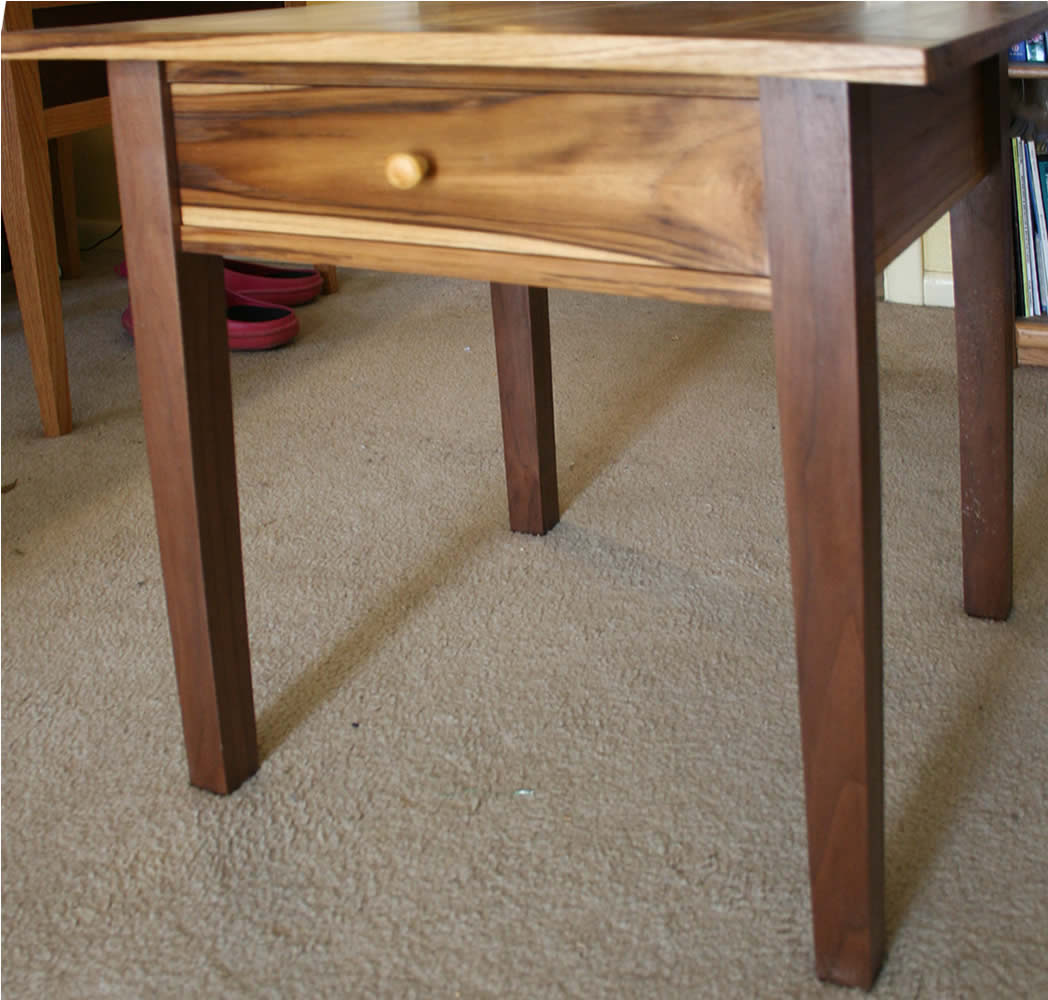
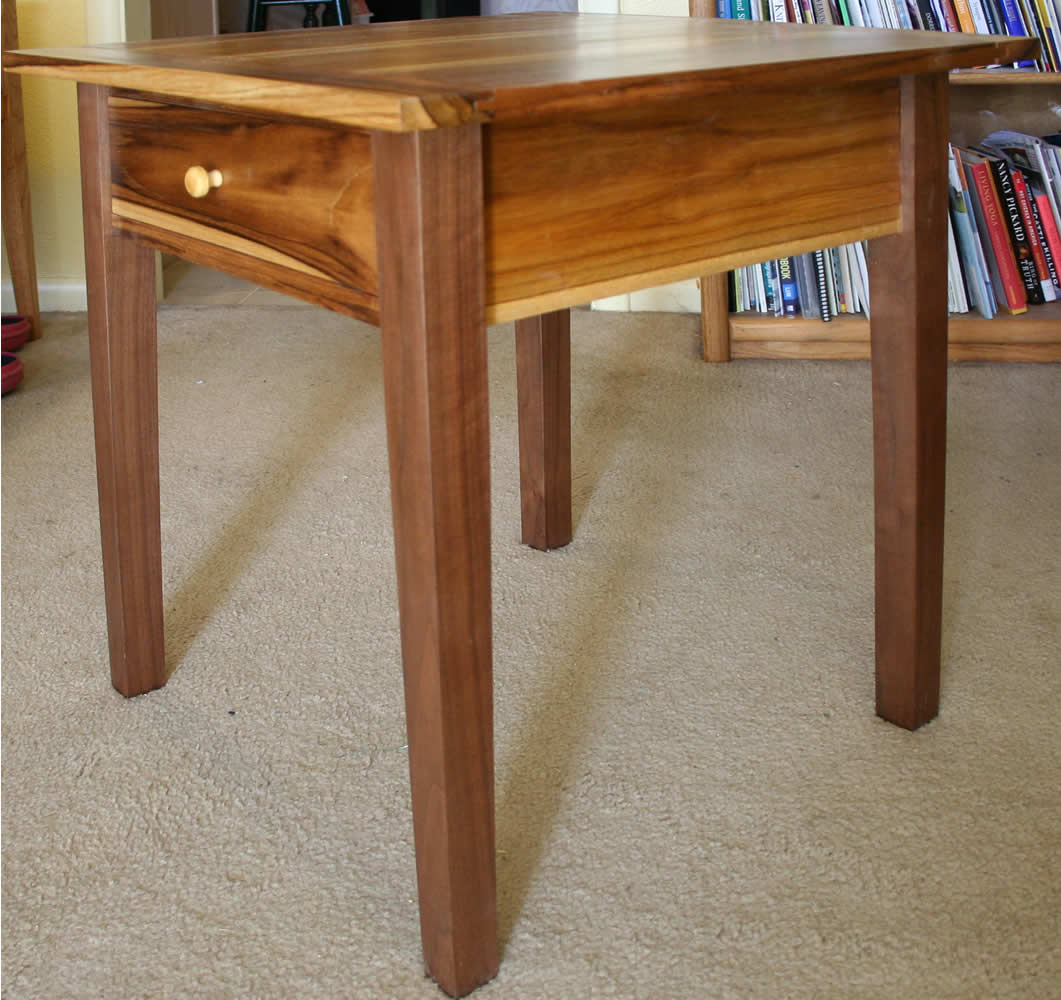
Here's an end table combining walnut and cherry as the primary woods.
The top and sides are walnut, and the edge of the top and the legs
are cherry. The edge banding of the top is joined at the corners with
a mitered dovetail tenon joint.
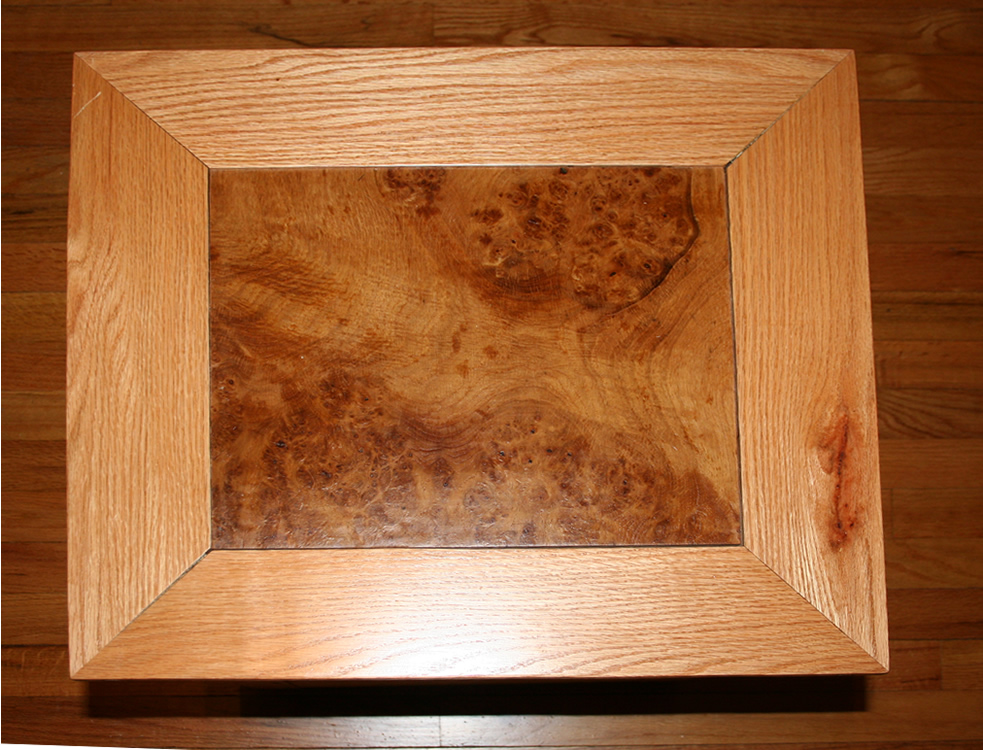
Here's another combination table, with a top veneered with book-matched
burl wood, sides of highly figured burl of similar color, a front
drawer of mahogany and the legs and edge banding of oak. After the picture
was taken, I added a drawer pull.
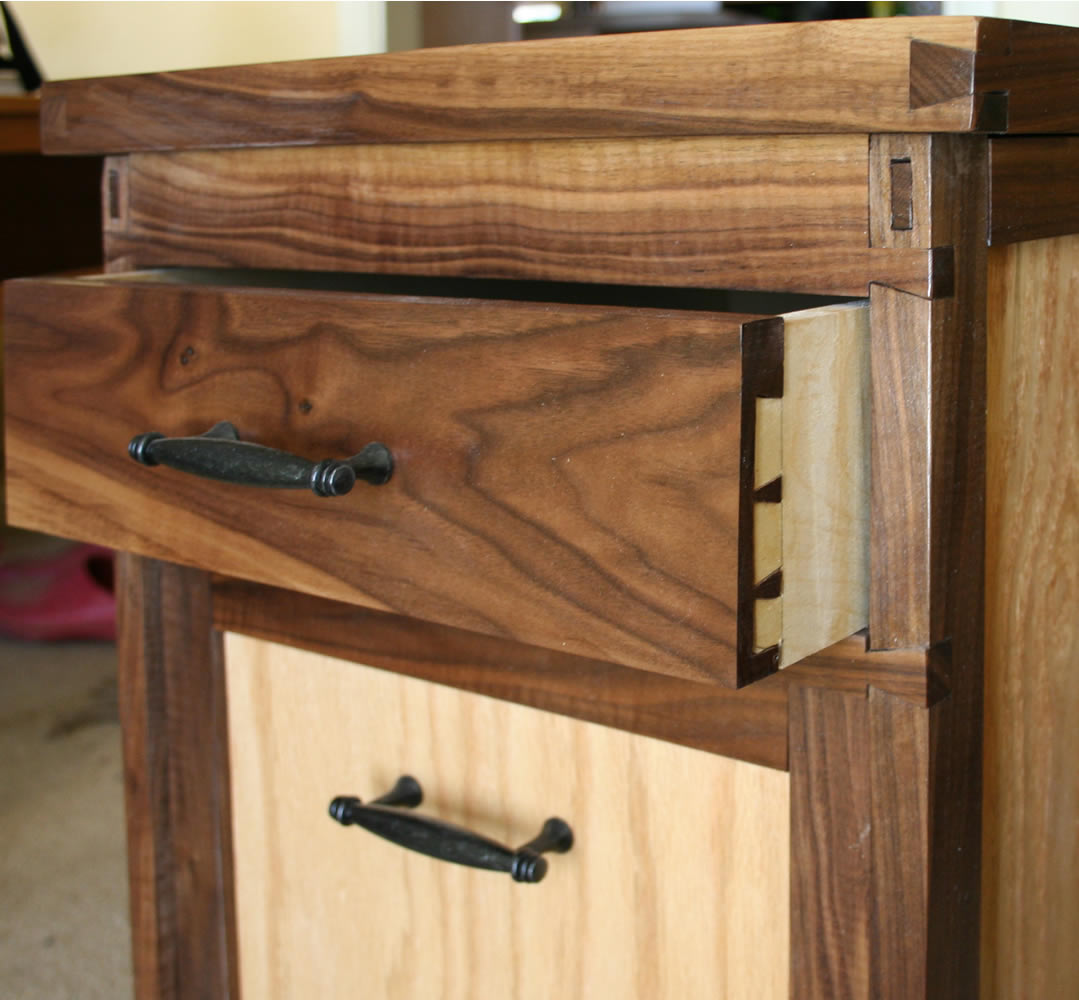
I always make hand dovetailed drawers and use maple or poplar as the
secondary wood. Drawer bottoms are usually birch plywood or occasionally
lauan. Hand dovetails are easy to make, really, really easy, and look
so much better than machine made dovetails. With experience, you can
hand make dovetails for one or two drawers in the time it takes to set up
a machine dovetailing apparatus.
There were lots of other small tables where I experimented with
different joinery, veneers, and combinations of different wood. One
combined cherry and bird's eye Maple. The top was Bird's Eye Maple
veneer and the sides, back and front, solid Bird's Eye Maple. Legs
of cherry and the cherry edge banding used the mitered dovetail
tenon joints again.
And for the last of the end table series, one made combining some
of the last of my Rhodesian teak and Walnut.
I also made a large coffee table of walnut from Dixie Lumber. In the last
year we were in New Orleans that time, the owner of the company was
killed in a plane crash while visiting Honduras. The company was then
closed and the lumber sold off at fire sale prices. I purchased two matched
pieces of Walnut, 22 inches wide and seven feet long. They were adjacent
cuts from a log of American Black Walnut and were highly figured with
some burl areas. One piece I used to make a living room coffee table using
walnut I purchased in Arkansas. The second piece I later used as the top
for a storage chest I made in Santa Fe. It had split during the nearly
50 years I had carried it about, but I could use bow-ties to stablilize
the cracking. The two pieces were adjacent cuts and would have made
a magnificent large dining table, but we did not need one and would
not be able to use it today. Although there are days I fantasize about
combining the two pieces of walnut in that way.
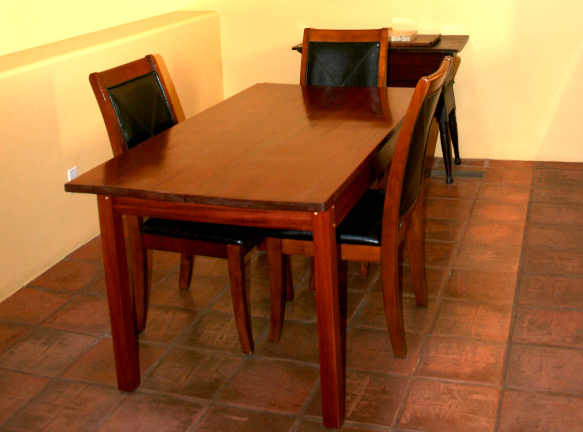
I got some beautiful
ribbon stripe rift-sawn Houduras Mahogany at the same time. One piece
16 inches wide and
twelve feet long, which I later cut into two six foot pieces and
used to make a small dining room table in Santa Fe, the very last furniture
and the last table I have made.
Here's the mahogany dining table in our Santa Fe house.
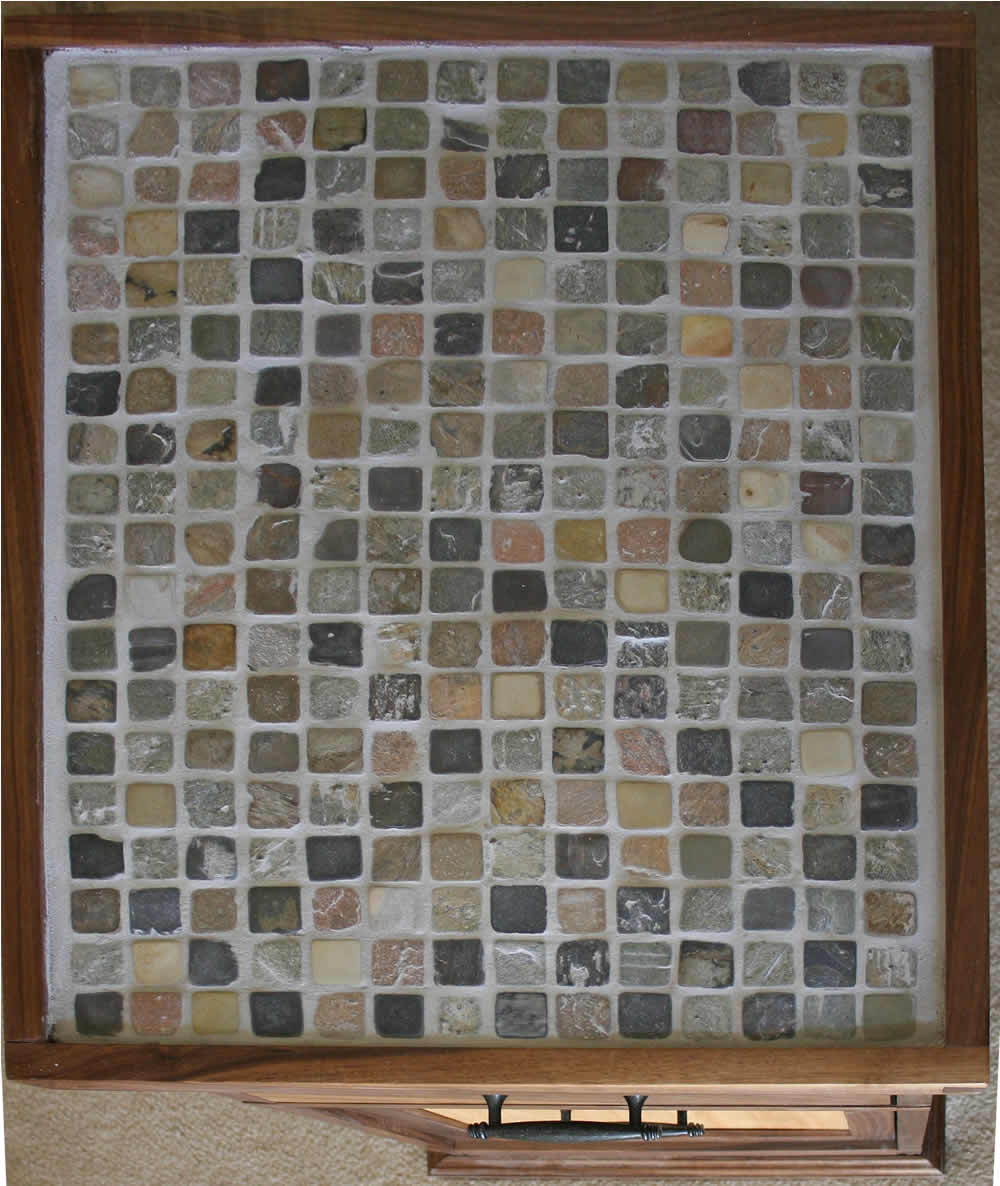
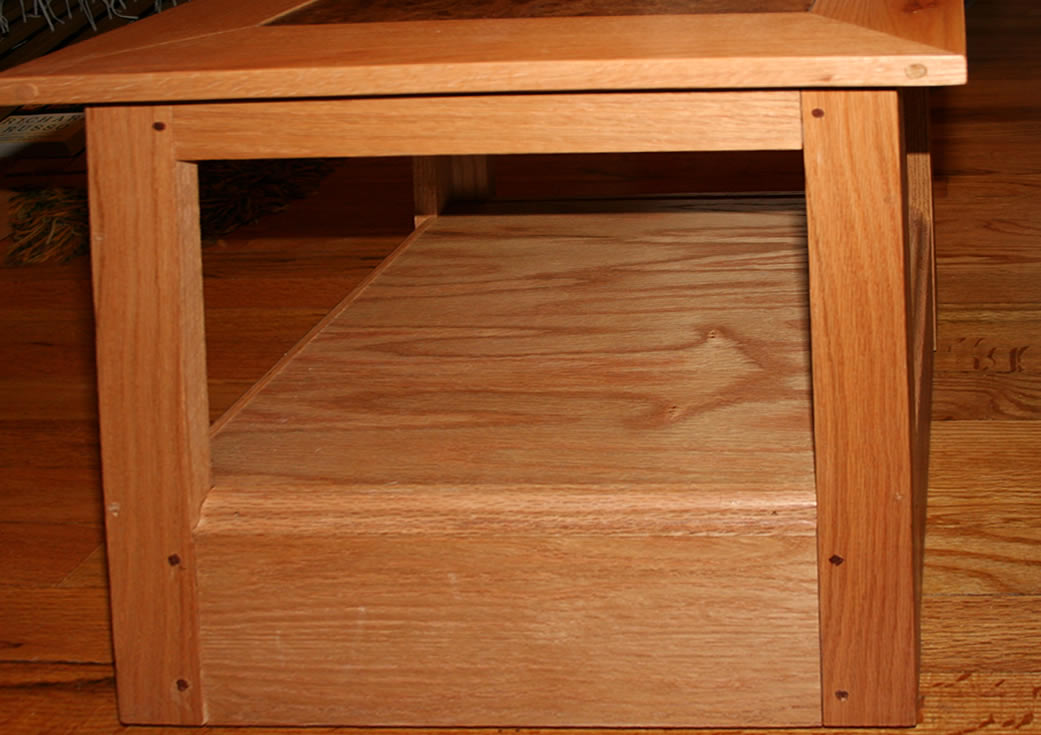
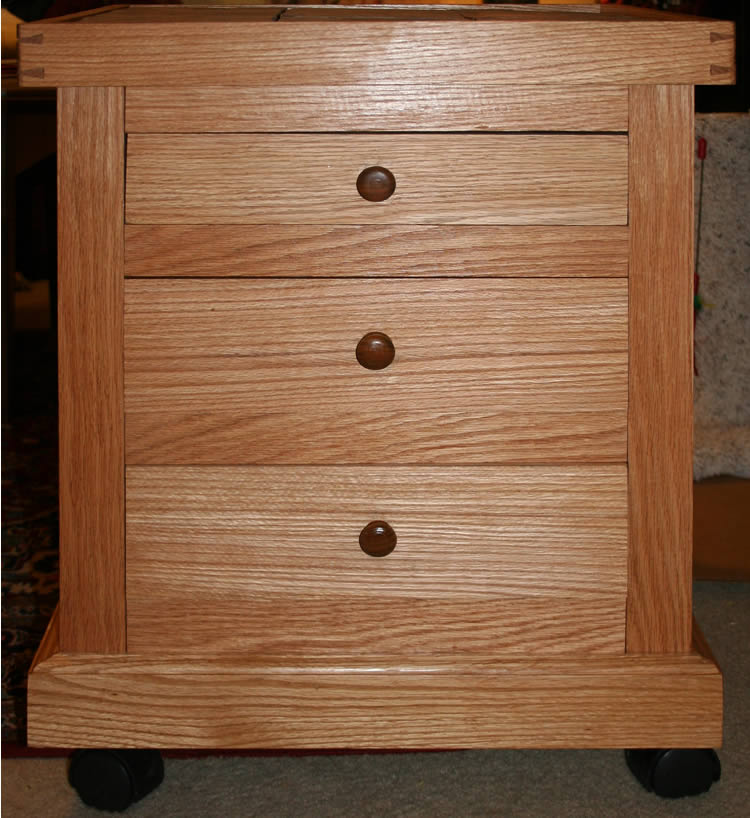
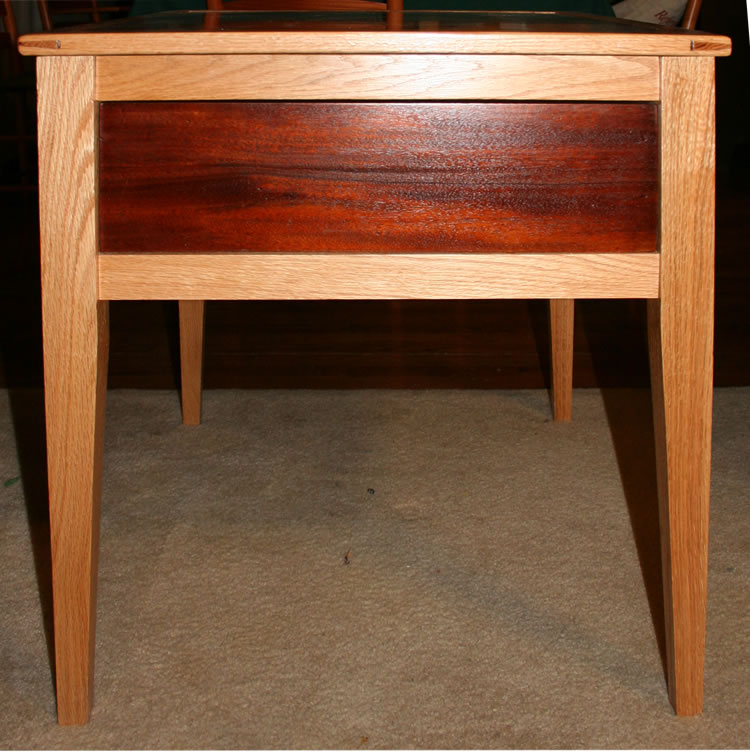
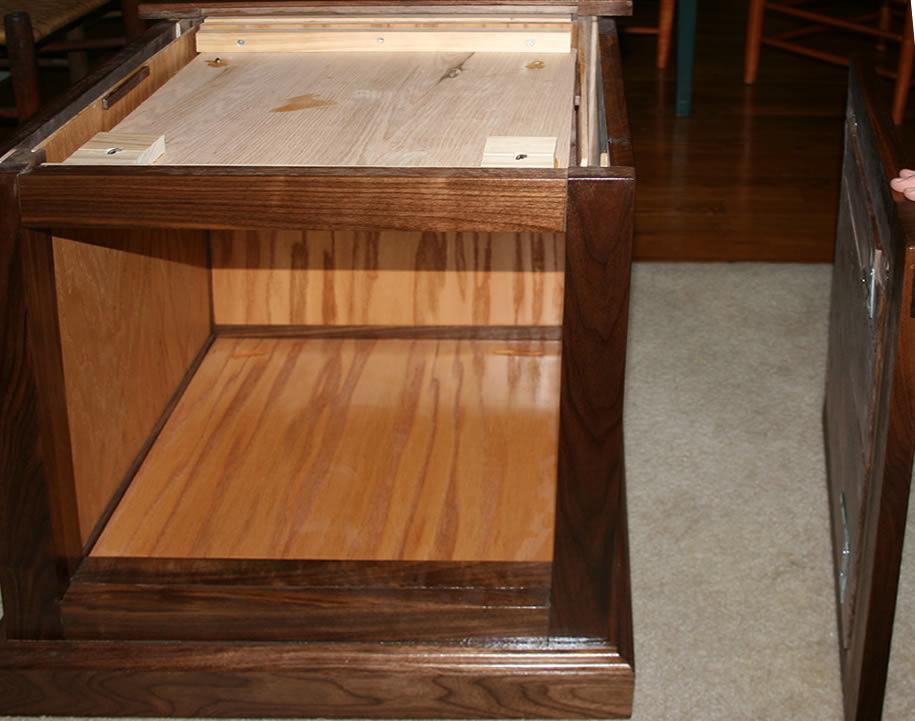
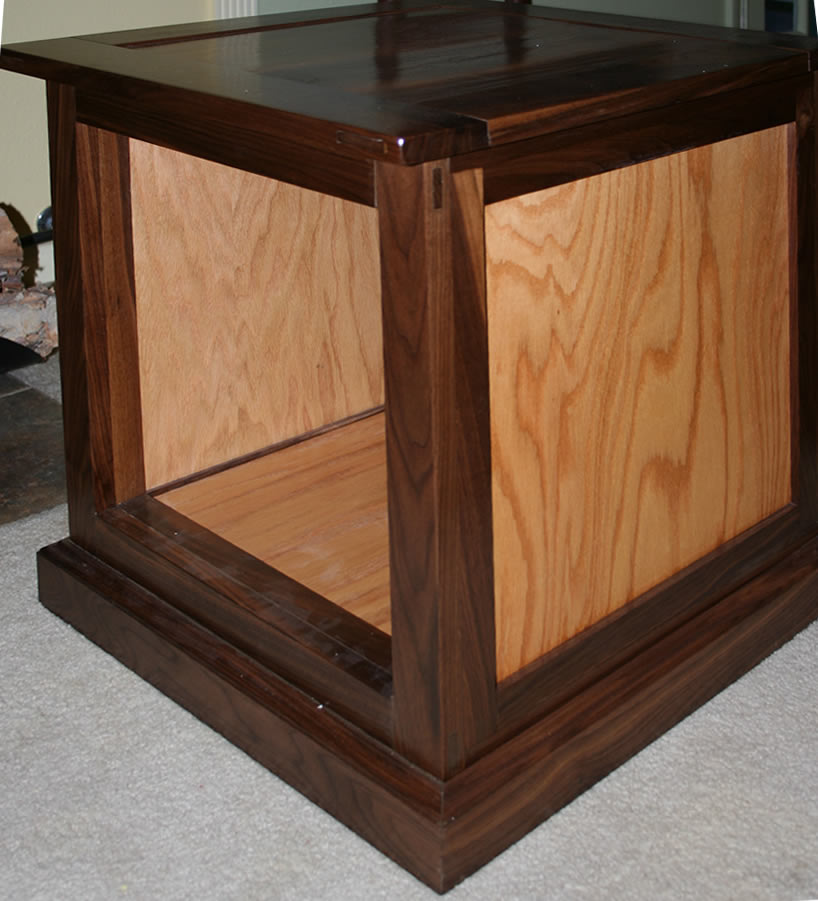
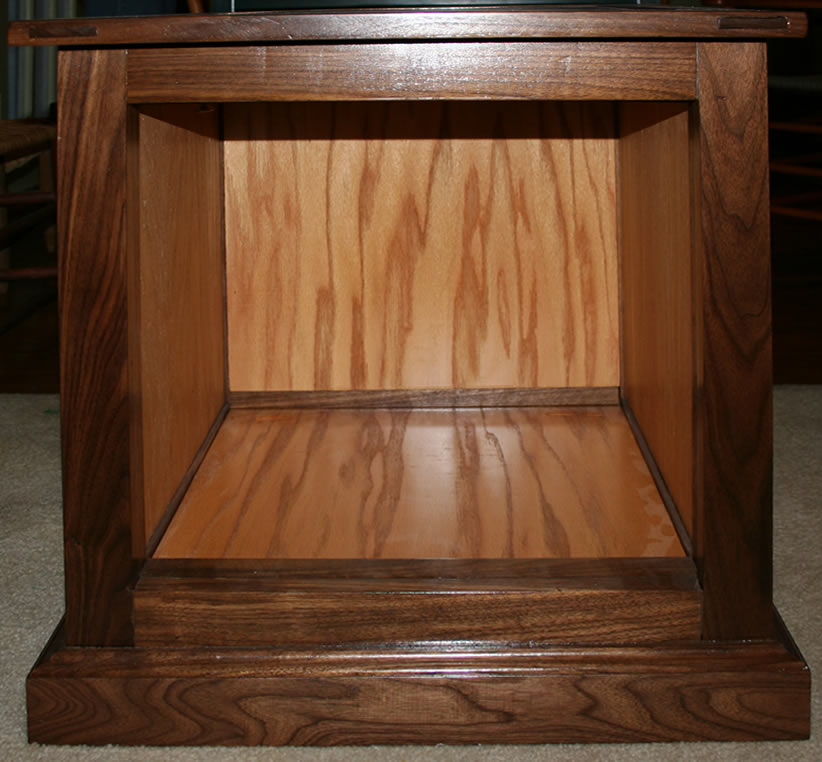
One of our sons particularly likes puzzles and mysteries and the occult. So
an "end table" with multiple secret compartments seemed a great gift.
Here's a series of instructions and photos showing how this "table' works.
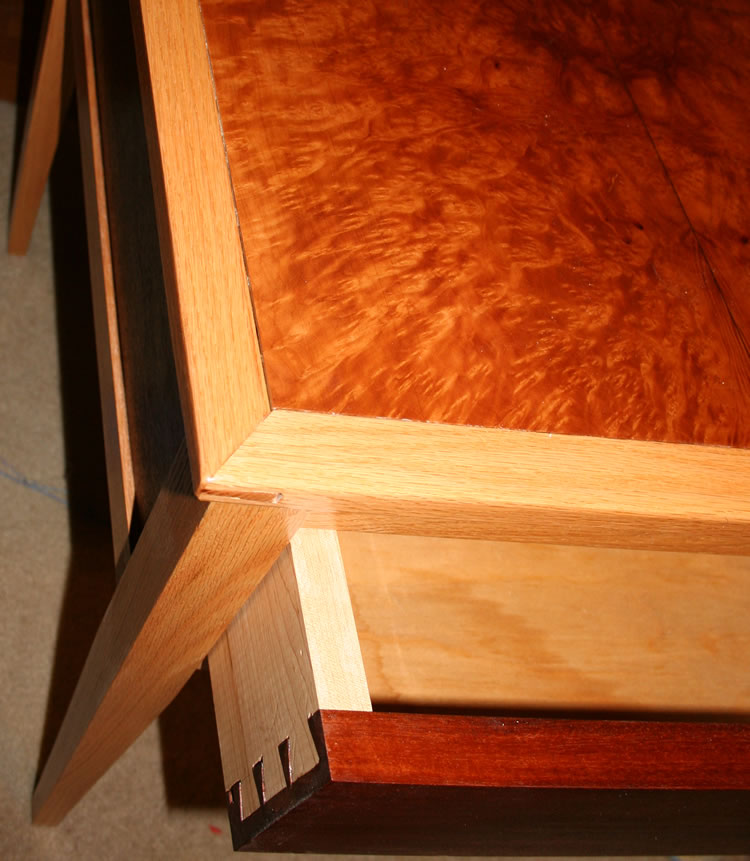
First, some pictures of the finished piece.
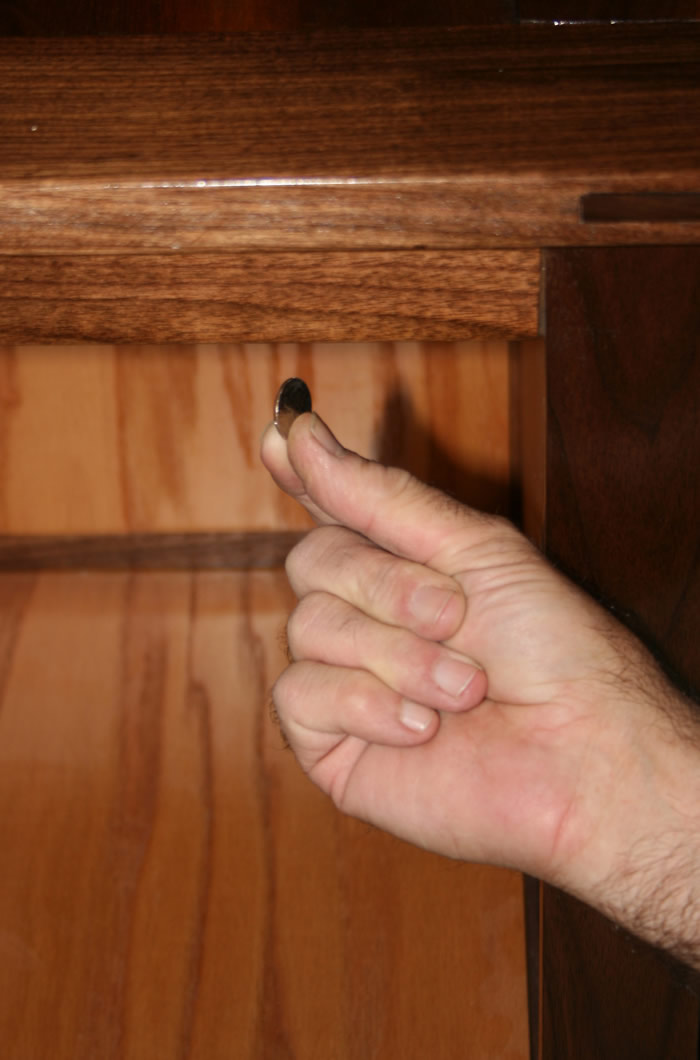
Instructions for opening the compartments.
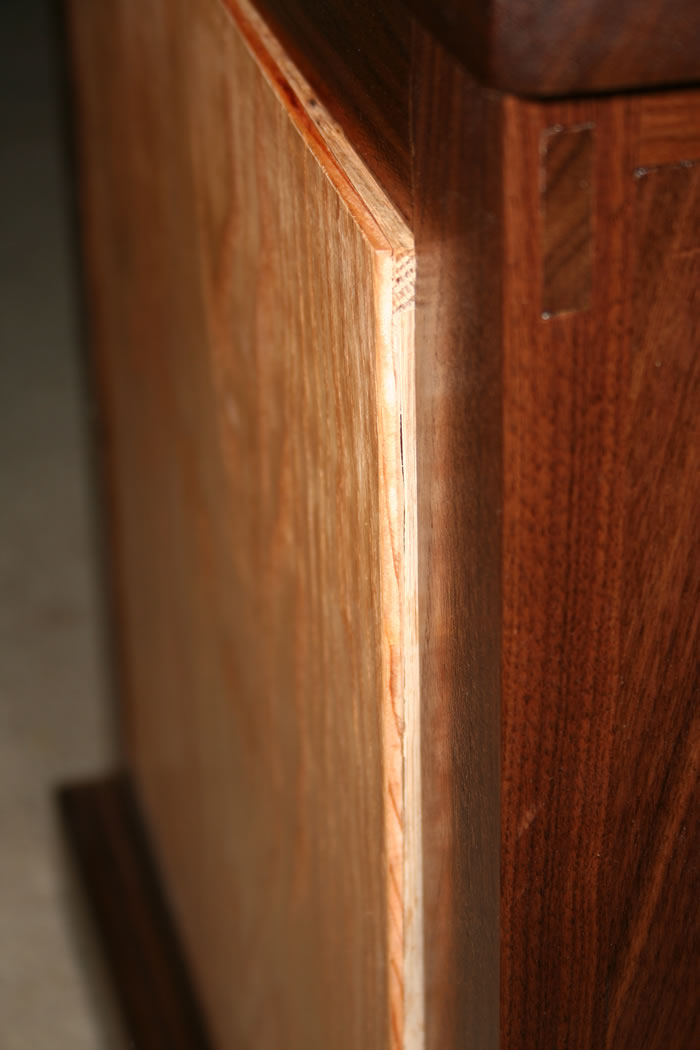
Use a coin to turn two screw heads which hold the top down. Turning them 90 degrees
frees the top, which slides back out of a false tenon joint and then moves up to reveal
the first compartment.
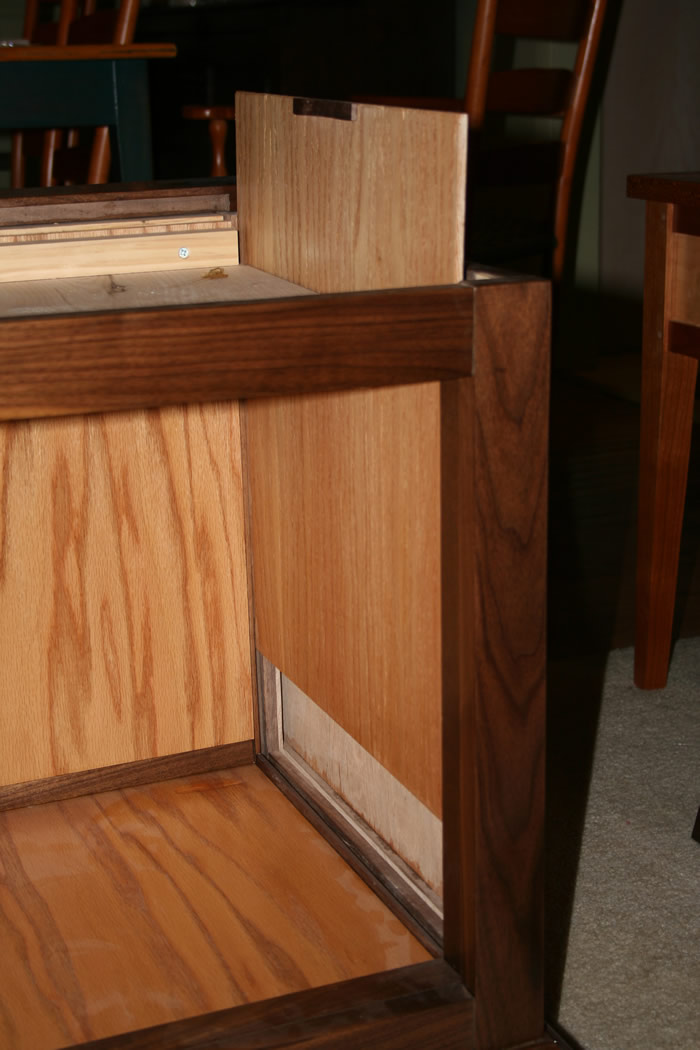
Lift the top off and set aside. This reveals the first "secret" compartment.
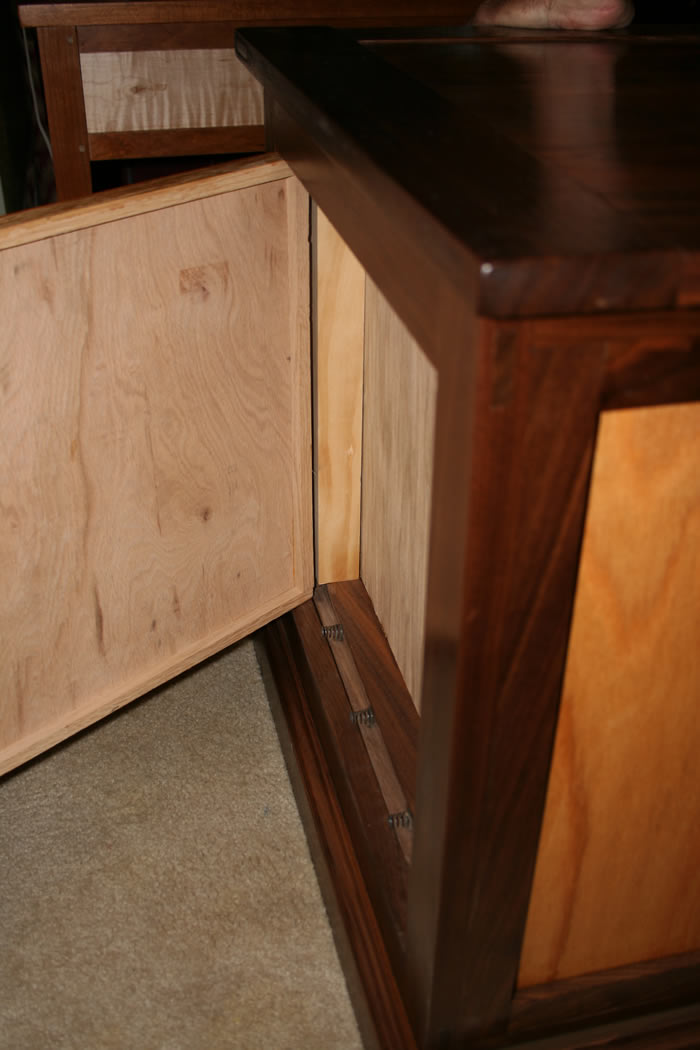
Then this also reveals two side panels that slide up to reveal two
slim compartments for valuable secret papers.
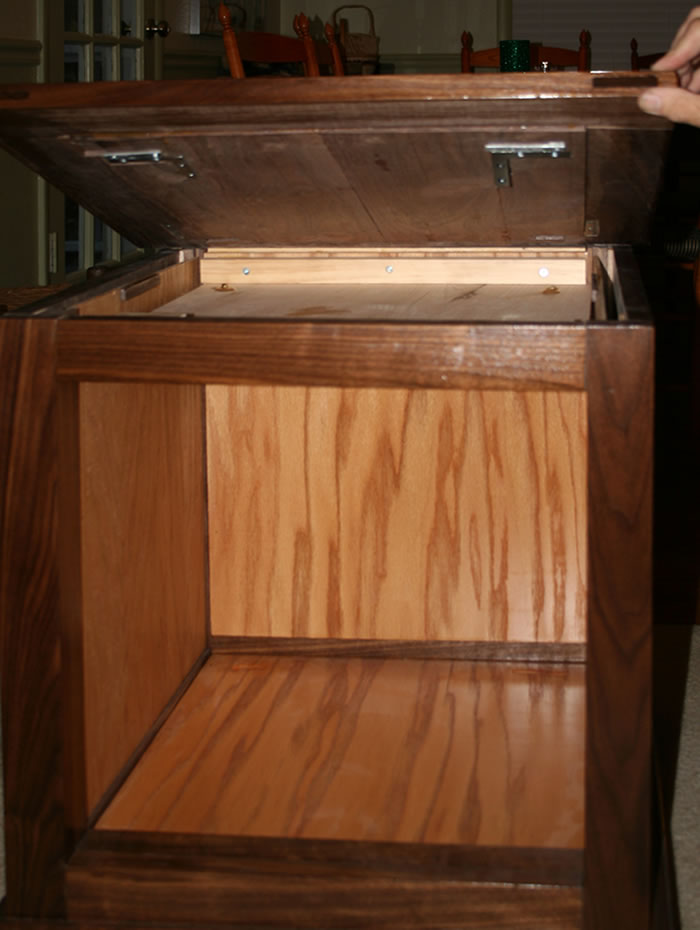
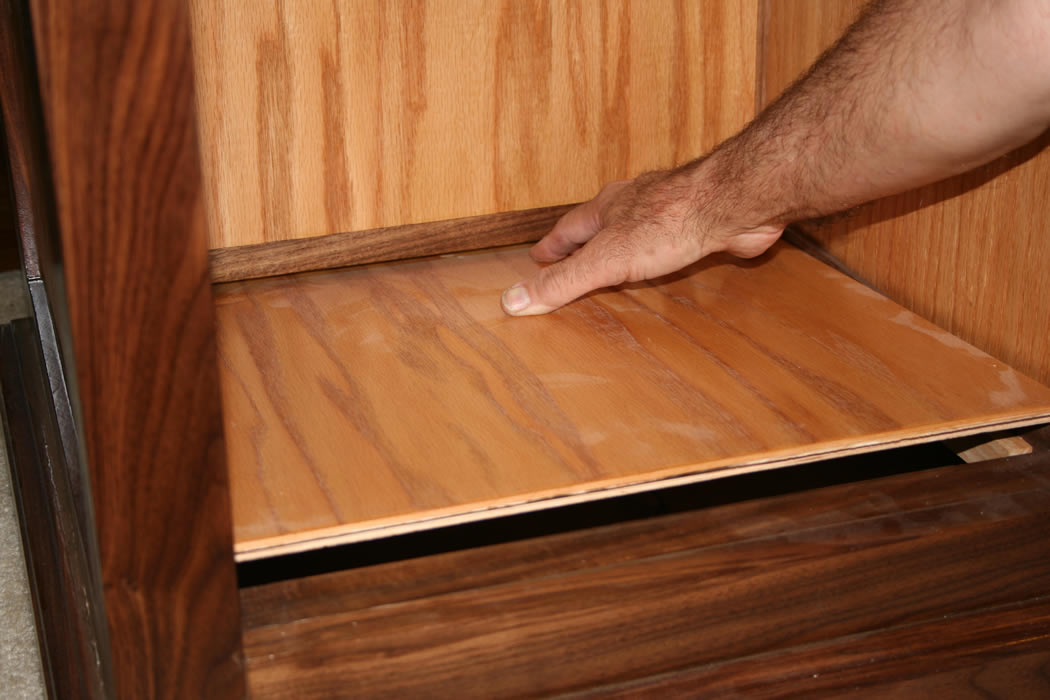
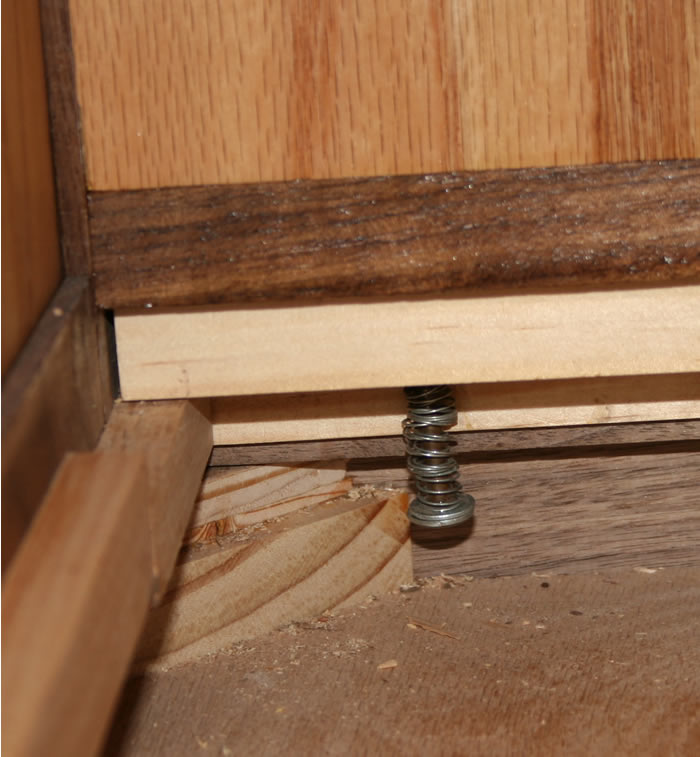
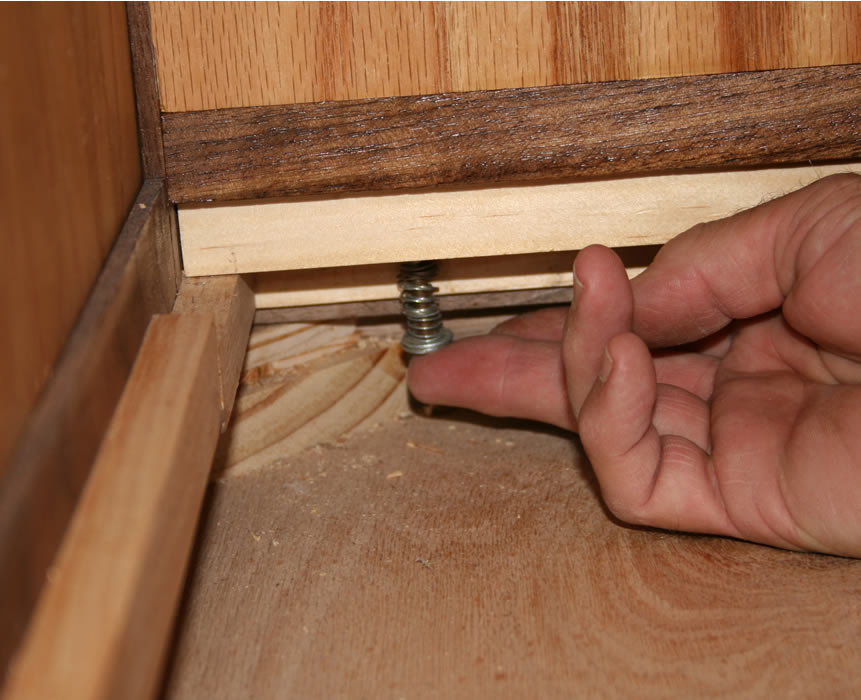
Pushing the spring loaded bottom of the cabinet backwards and pressing down
at the rear, frees it and tilts it up so it can be lifted
free, revealing the larger compartment in the base of the cabinet.
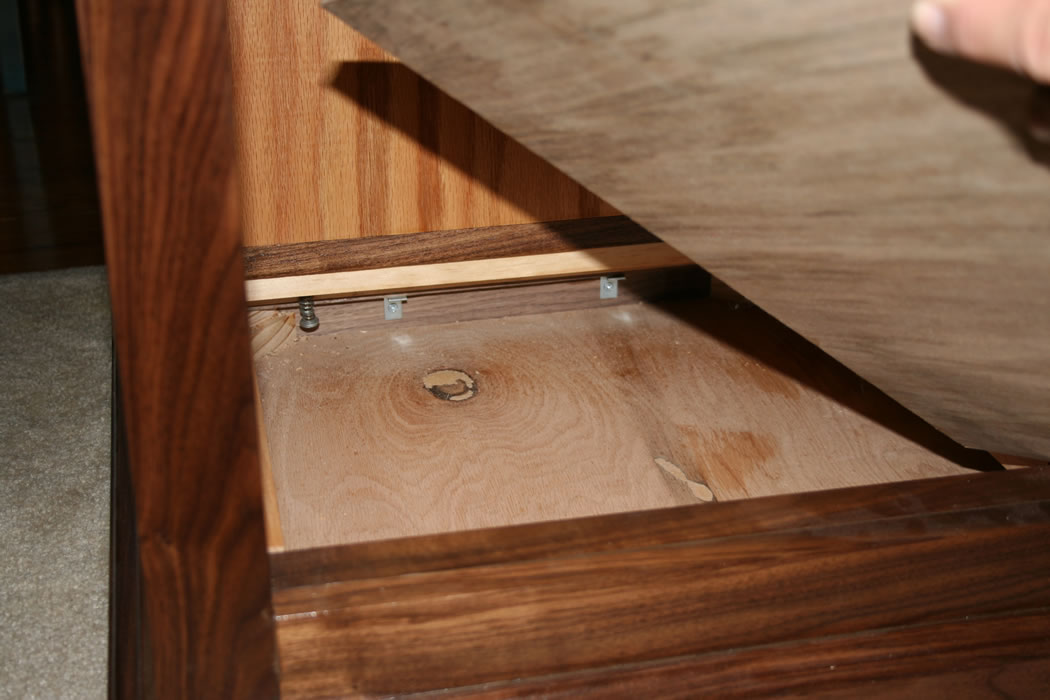
Removing the false bottom also exposes a spring loaded
catch release button at the left rear. Pushing this button up
releases the rear panel which opens on a concealed hinge to reveal
the last compartment.
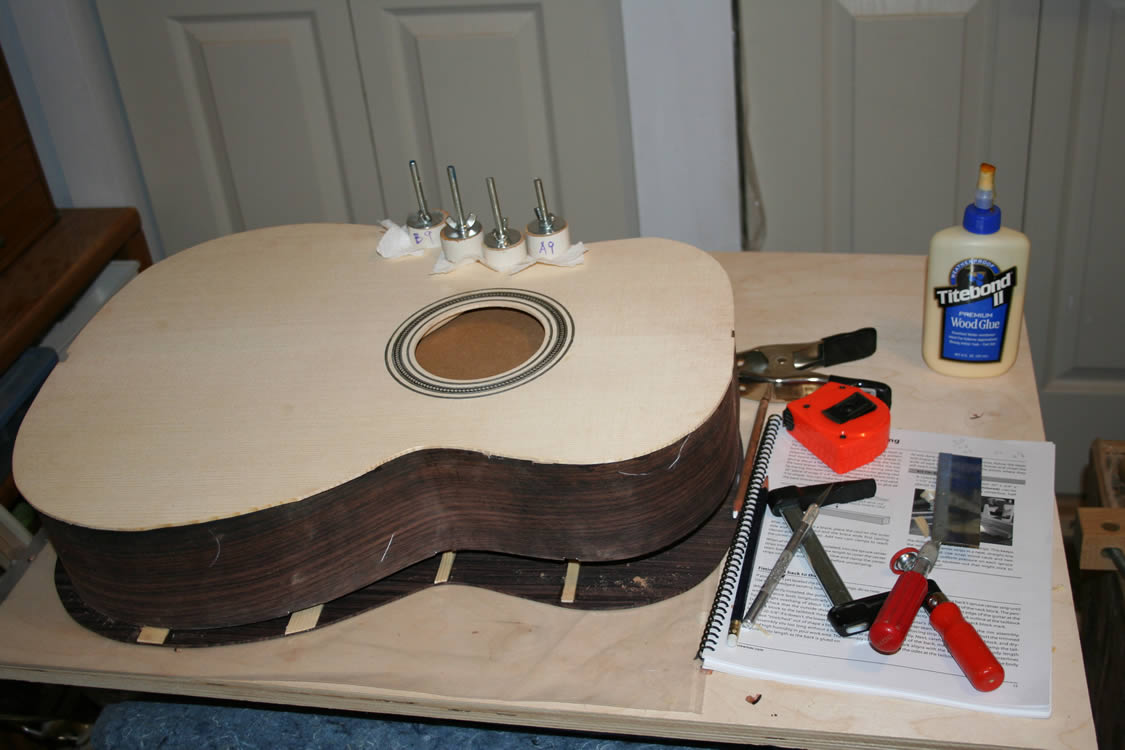
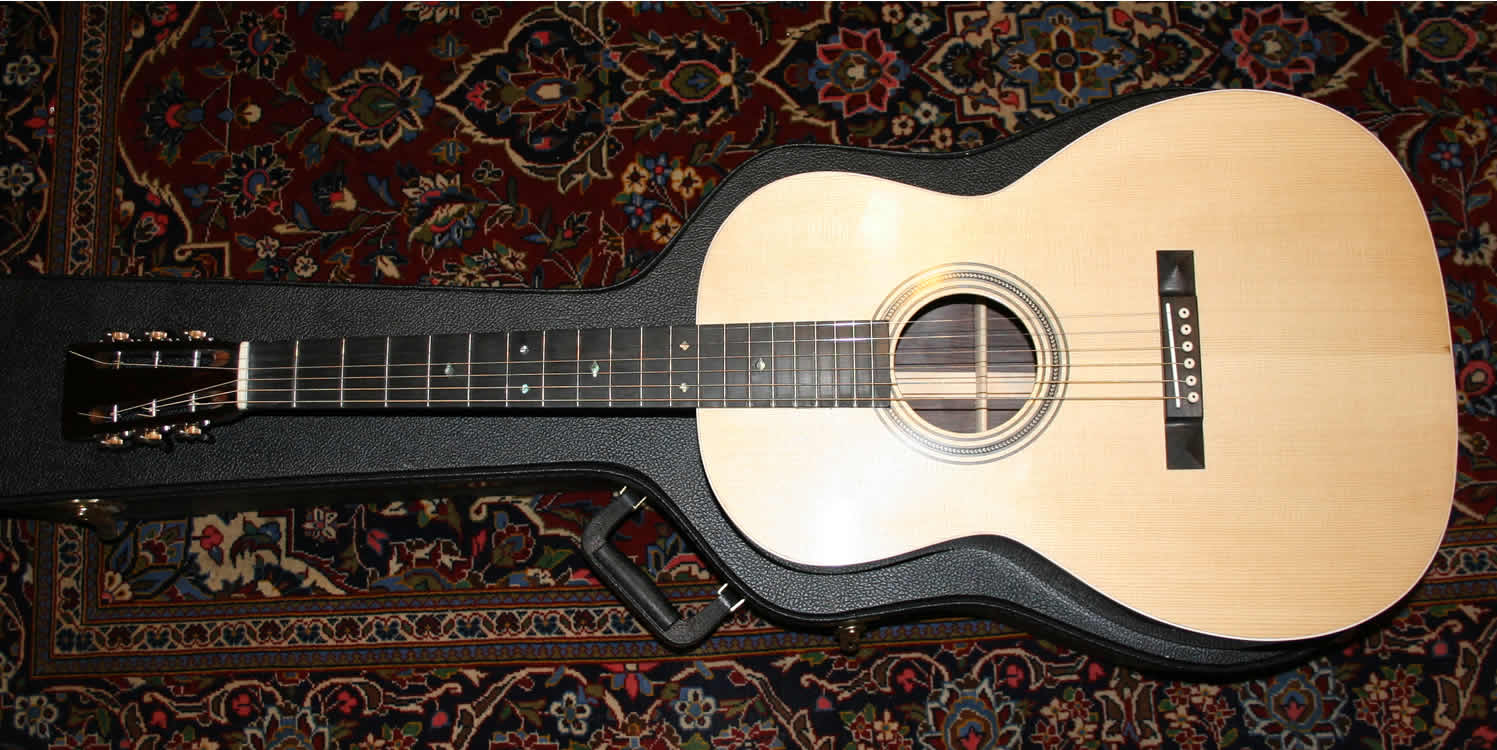
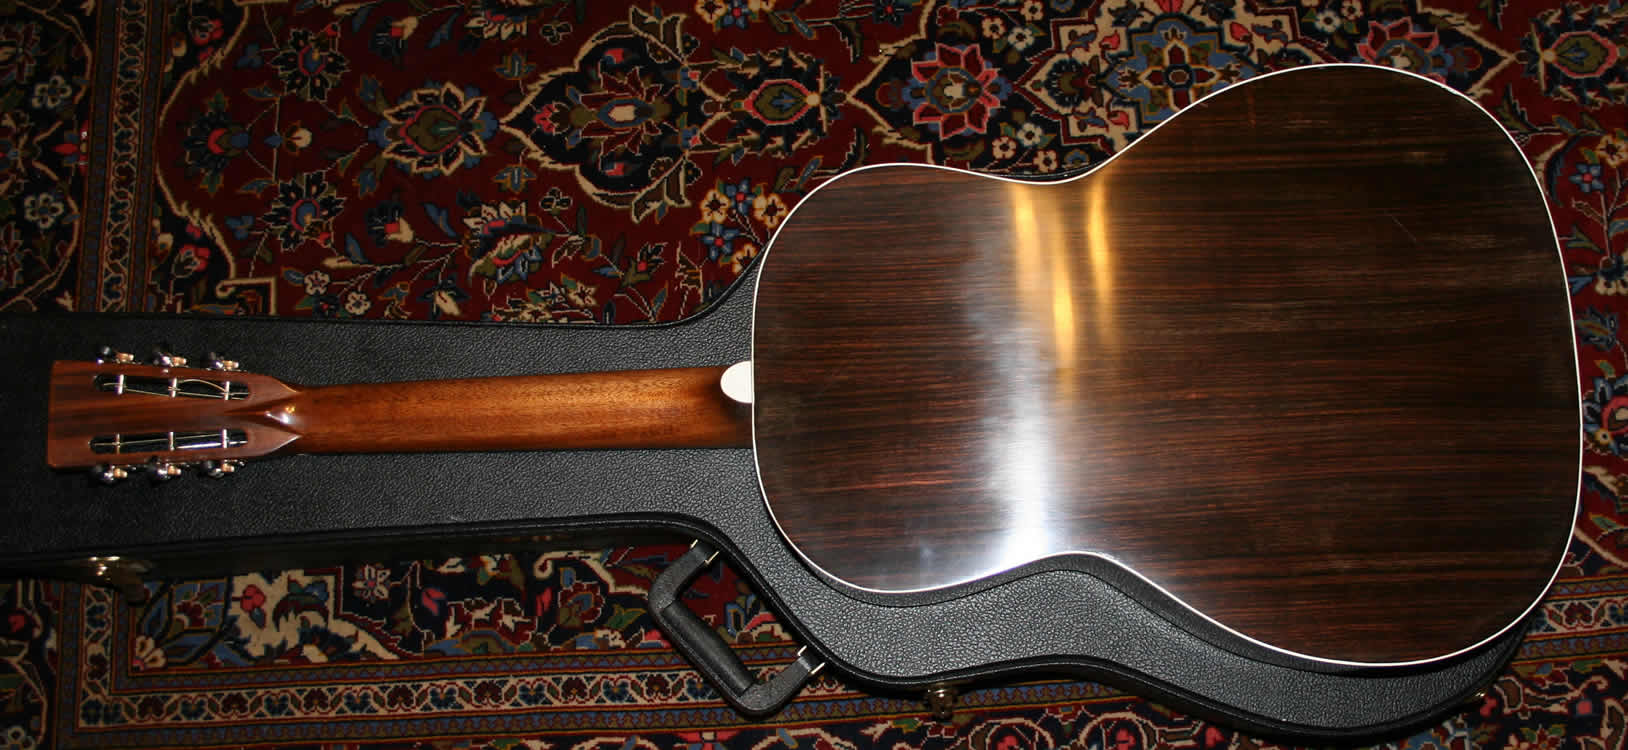
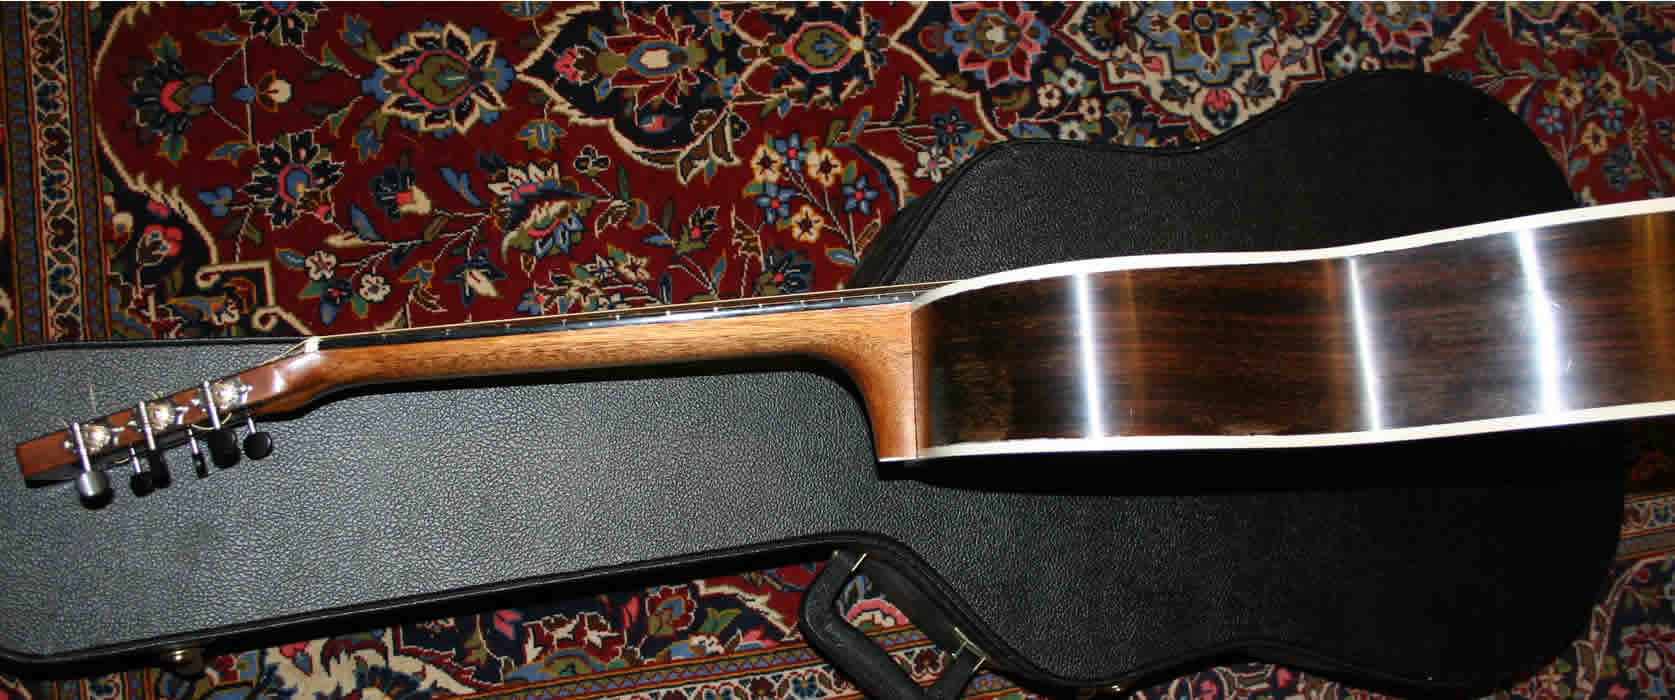
I also built a guitar for one son from a Stewart Macdonald (now StewMac) kit.
An expensive
way to get a guitar, but a good learning experience. Not gonna do
it again, for sure.
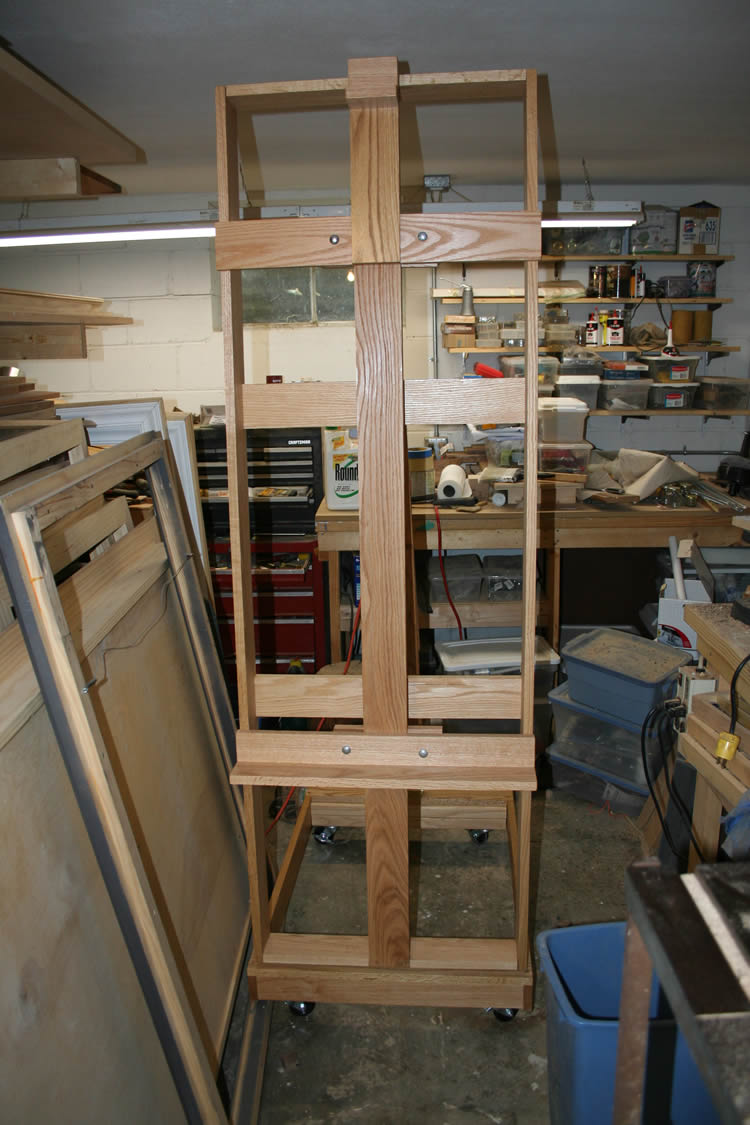
I built a studio easel for one of my sons.
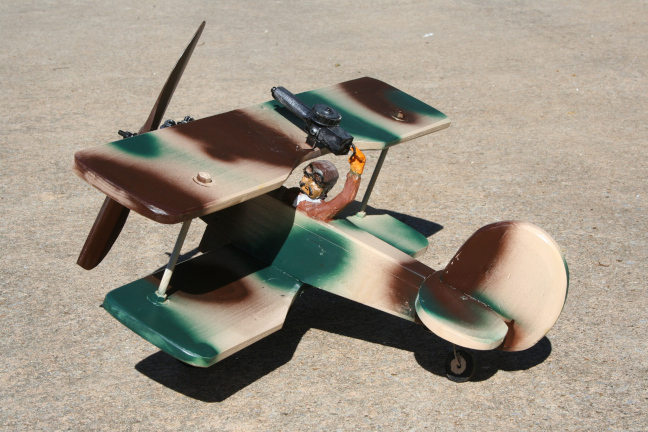
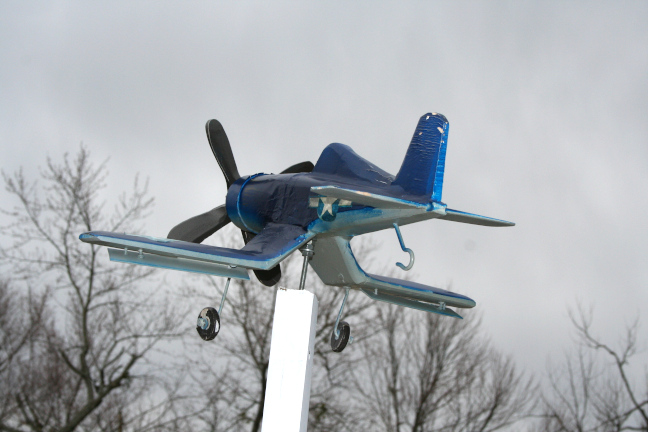
I built several "whirligigs" in Arkansas.
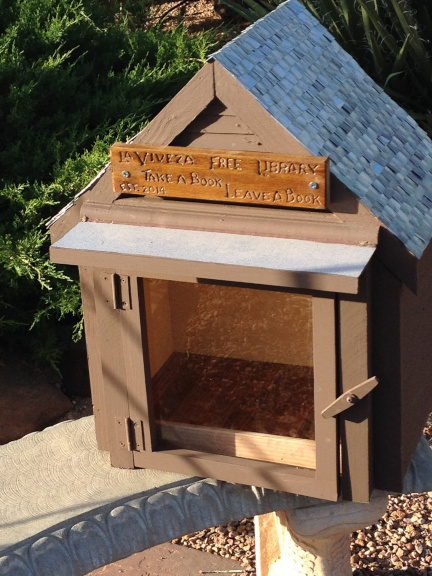
In Santa Fe I built a Little Free Library for the neighborhood.
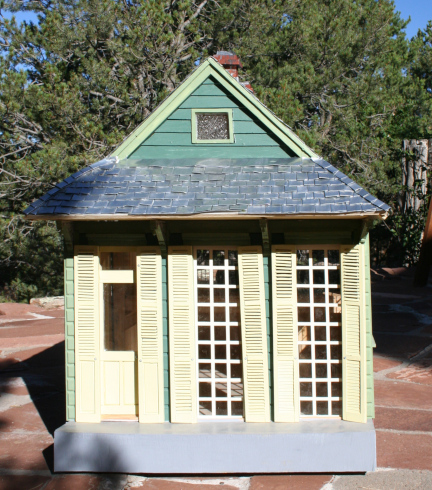
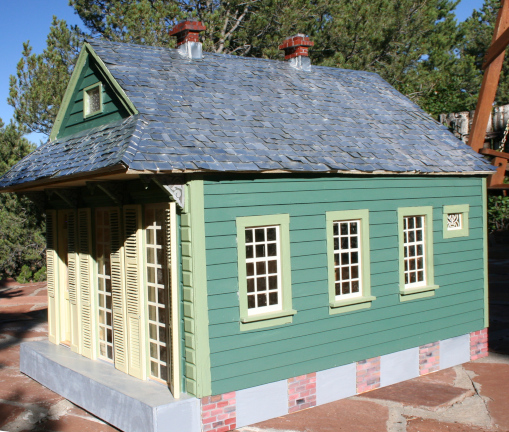
I also built a two level wooden house for our cat when traveling. It fit
into our Subaru Forester and she traveled in it from Santa Fe to Tucson to
San Diego to Santa Monica and back. And later, to New Orleans, her
final trip. The "cat conto" was simple in design, functional,
and made from plywood. Later, I built a second, fancier version, to
resemble a New Orleans shotgun house. It was not as practical and was
never used. But it looked nice.
Here are some pictures of the "up-scaled" version of the cat condo.
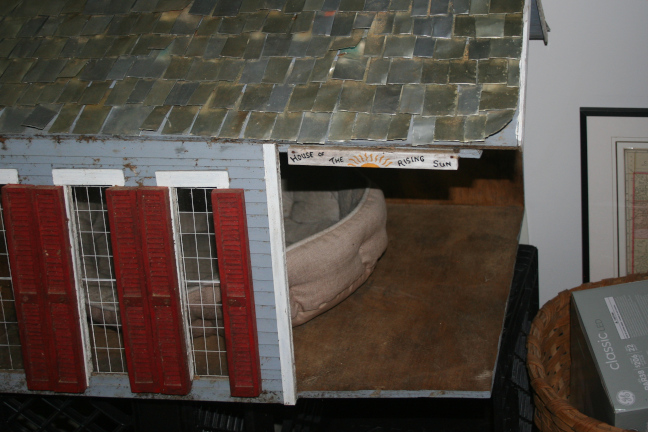
In New Orleans, I built a similar shotgun style house for our cat,
then living
outdoors, now an inside cat. Since it was a "cat house" and
this is New Orleans, I named it "House of the Rising Sun".
'Nuf stuff on the wood working.